Introduction:
Windows 10 is a robust operating system, but it can encounter issues like missing or corrupted system files. When faced with such problems, you can turn to powerful command-line tools like DISM Scan (Deployment Image Servicing and Management) and SFC (System File Checker) commands to repair your system without the need for a full reinstallation. In this guide, we’ll walk you through the steps to use SFC and DISM Scan to bring your Windows 10 computer back to a healthy state, saving you time and frustration.
1. Understanding SFC and DISM Scan :
Before we dive into the repair process, let’s understand what SFC and DISM Scan are:
• DISM (Deployment Image Servicing and Management):
DISM Scan is like a doctor for your Windows operating system. It’s used to diagnose and fix problems with your system’s files and configurations. It can scan for issues, repair corrupted files, and prepare, modify, or restore your Windows image. It’s handy when your Windows isn’t working correctly due to missing or damaged files, and it can even use an external source to replace problematic files.
• SFC (System File Checker):
SFC Scan is like a mechanic that specifically checks and repairs important system files in Windows. It scans your system for corrupted or missing system files and then replaces them with good ones from a cached copy. It’s useful when your computer starts acting strangely, shows error messages, or has issues related to system files.
2. Preparing for Image Repair:
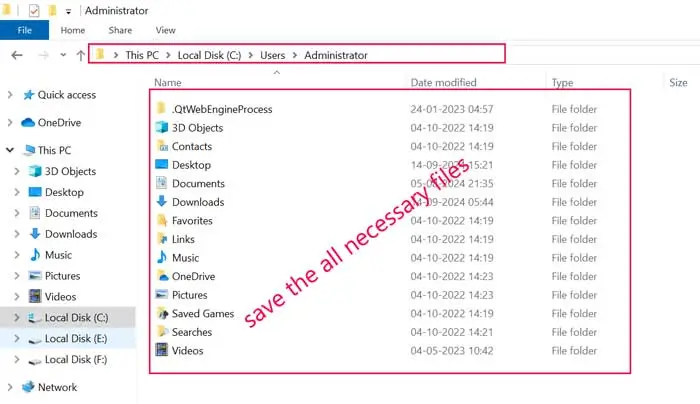
Before you start the repair process, it’s essential to take your Data Backup. How to backup your data, please follow these steps:
Open Local C: drive > User>Select and Open User then copy all your necessary files and save it to a safer place.
3. Running SFC to Repair Windows 10:
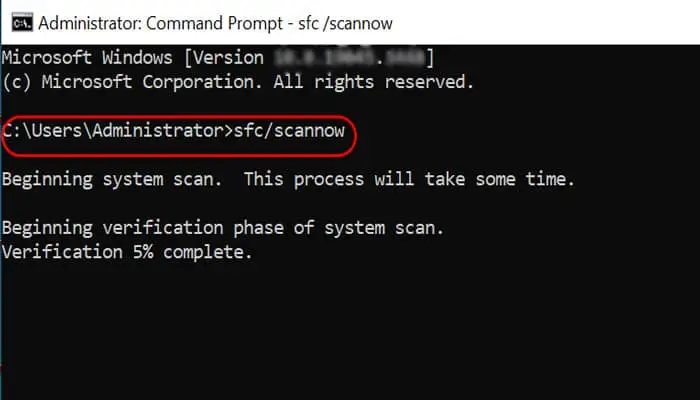
When your computer starts acting strangely or shows error messages, you should run the SFC tool to solve the issue. For this, follow these steps:
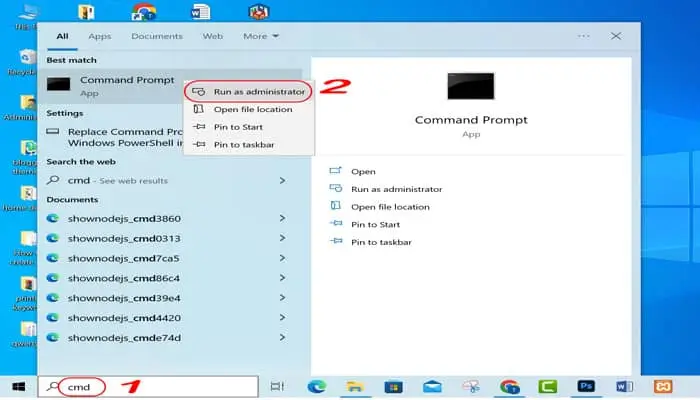
- Open the search box.
- Then type “Command Prompt” in the box then right-click the top result, and then select “Run as administrator.”
- In the command prompt window enter the following command and press Enter:

SFC /scannow
This process, once completed, starts Windows normally. If the problem is resolved, there is no need to use the DISM command.
If SFC can not solve the issue then use the DISM command.
4. Using DISM Scan to Repair Windows 10 Image:
The DISM tool offers multiple options for repairing your Windows 10 image, including “CheckHealth,” “ScanHealth,” and “RestoreHealth.” We recommend using them in this order.
a. DISM Command with CheckHealth Option:
The CheckHealth option with DISM command identifies any corruptions within the local Windows 10 image. Please follow these steps:
- Open the search box.
- Then type “Command Prompt” in the box then right-click the top result, and then select “Run as administrator.”
- In the command prompt window enter the following command and press Enter:

DISM /Online /Cleanup-Image /CheckHealth
This command will check for any corrupted file in windows without making any repairs.
b. DISM Scan with ScanHealth Option:
The ScanHealth option performs a more advanced scan feature to detect any problems. Follow these steps:
- Open Command Prompt as an administrator.
- Enter the following command in the cmd windows to perform an advanced DISM scan:
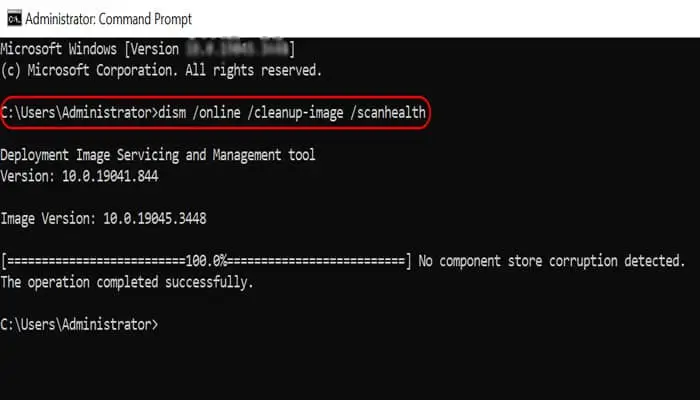
DISM /Online /Cleanup-Image /ScanHealth
This scan may take some time to check whether the Windows 10 image needs to be repaired or not.
c. DISM Scan with RestoreHealth Option:
If issues are detected, you can use the RestoreHealth option to automatically scan and repair common problems. Follow these steps:
- Open Command Prompt as an administrator.
- Type the following command in the command prompt to repair the Windows 10 image:

DISM /Online /Cleanup-Image /RestoreHealth
Note that if the command appears stuck, it’s normal behavior. The process will complete successfully after a few moments.
Once you complete these steps, DISM will connect to Windows Update online to download and replace damaged files as needed.
5. Fixing Problems with DISM Scan Using Install.wim Image:
Sometimes, DISM may require an alternative source if it can’t replace damaged files. Here’s how to use the install.wim image:
a. Downloading Windows 10 ISO File:
Before proceeding, you’ll need to obtain a fresh copy of the Windows 10 ISO file:
- Visit the Microsoft website.
- Click the “Download Now” button under Create Windows 10 installation media.
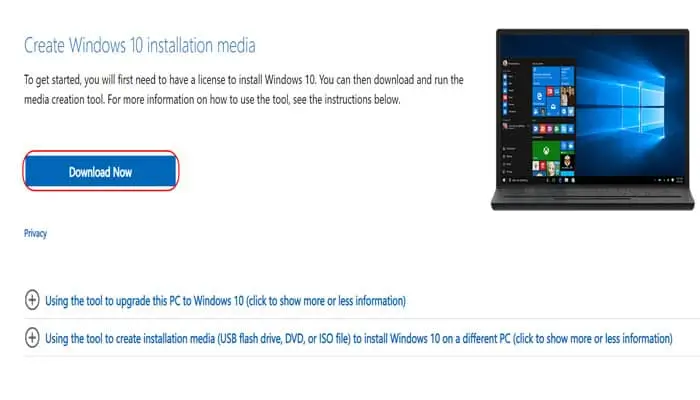
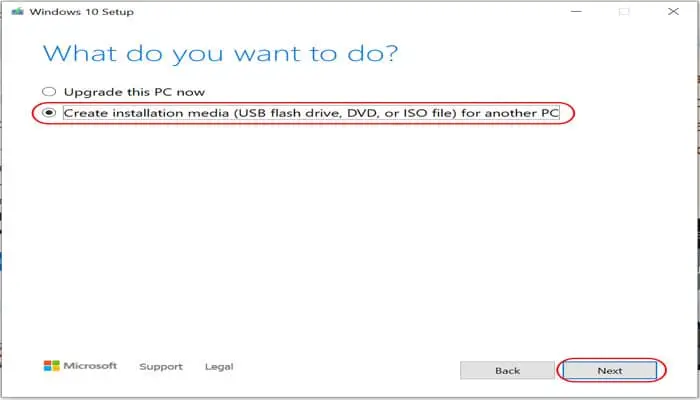
- Run the downloaded Media Creation Tool to create installation media.
- Select the “Create installation media (USB flash drive, DVD, or ISO file) for another PC” option.
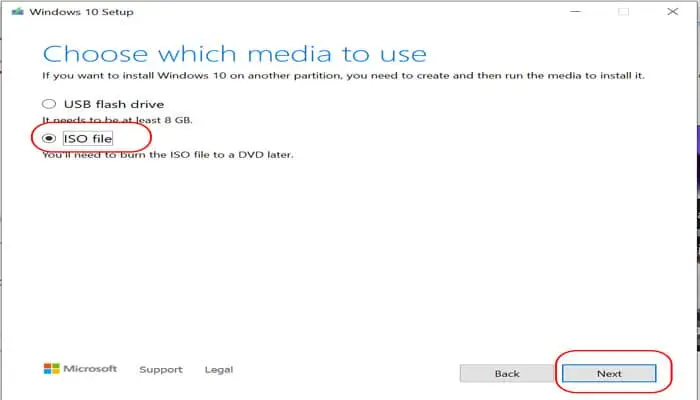
- Choose the ISO file option and save it to your preferred location.
b. Repairing with DISM Scan Using Install.wim Image:
Now, let’s use the install.wim image for repair:
- Open Command Prompt as an administrator.
- Type the following command to repair the Windows 10 image using the install.wim file you obtained earlier. Replace G with the ISO mount point drive letter in File Explorer:
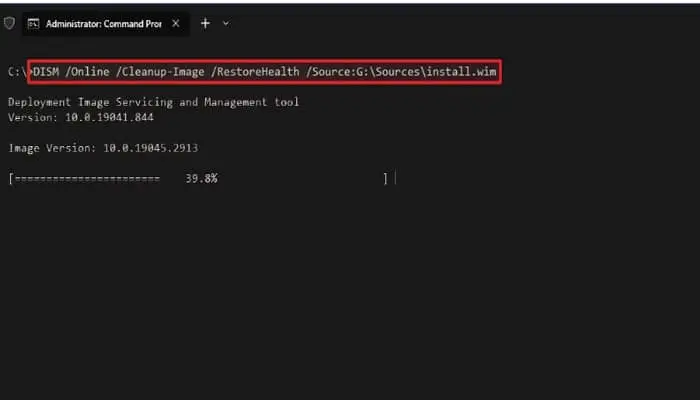
DISM /Online /Cleanup-Image /RestoreHealth /Source:G:\Sources\install.wim
Once you complete these steps, the command will scan and repair the problems using the install.wim file as the alternative source.
6. Fixing Problems with DISM Scan Using ESD Image:
If you have an encrypted install.esd image then you can use it to repair the damaged files. Follow these steps:
- Open Command Prompt as an administrator.
- Type the following command to repair the image with an install.esd file. Replace the file path with the location of your .esd file:
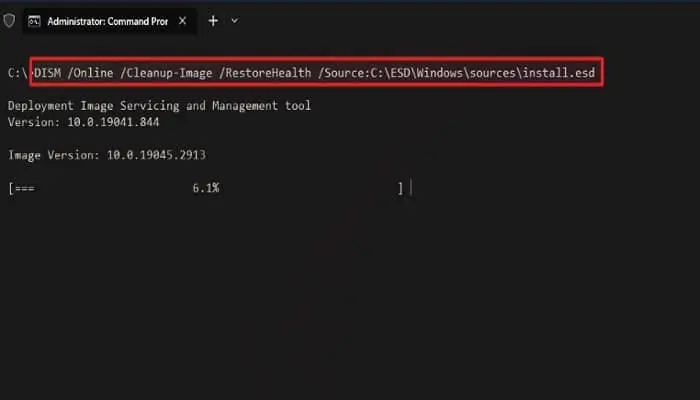
DISM /Online /Cleanup-Image /RestoreHealth /Source:C:\ESD\Windows\sources\install.esd
After completing these steps, the tool will repair the damaged files using the install.esd image.
7. Running SFC Scan to Repair Windows 10:
The above instructions help repair issues with the system image, but to address problems with the system installation, you can use the SFC tool:
- Open the Command Prompt as an administrator.
- Type the following command to repair the installation:
SFC /scannow
Running the command multiple times can ensure all issues are fixed correctly. This process once completed then the System File Checker tool will repair system files using the local image files.
Read Also: What is Windows Registry?
8. Conclusion:
By using these detailed steps, you can effectively use the SFC and DISM Scan tools to repair your Windows 10 image and resolve various system issues. These tools are invaluable in maintaining the health and performance of your Windows operating system. Remember to back up your data before proceeding, and with the right knowledge and tools, you can keep your Windows 10 PC running smoothly without the need for a full reinstallation.