Step 1: Backup Your Files
Before install Windows 10, it’s essential to back up your files to an external storage device. Syncing files to the cloud can be time-consuming and costly if you have a large amount of data. Using an external USB hard drive is often a more efficient solution.
To manually create a file backup, connect a drive with sufficient storage and use the following procedure.
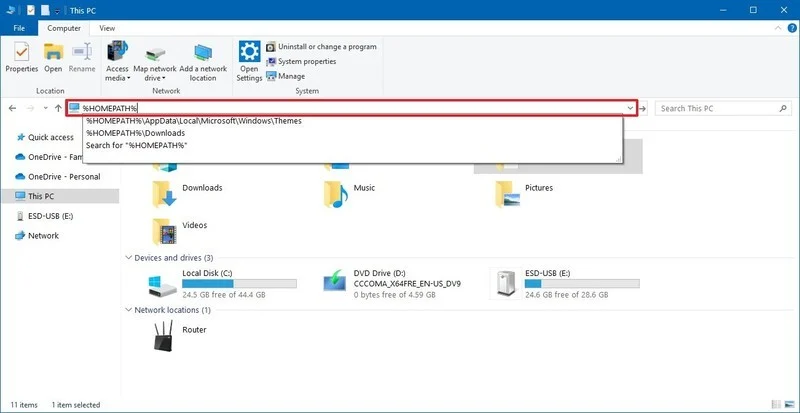

- Press the Window +E button from your keyboard, Open File Explorer.
- Type %HOMEPATH% in the address bar and press Enter:
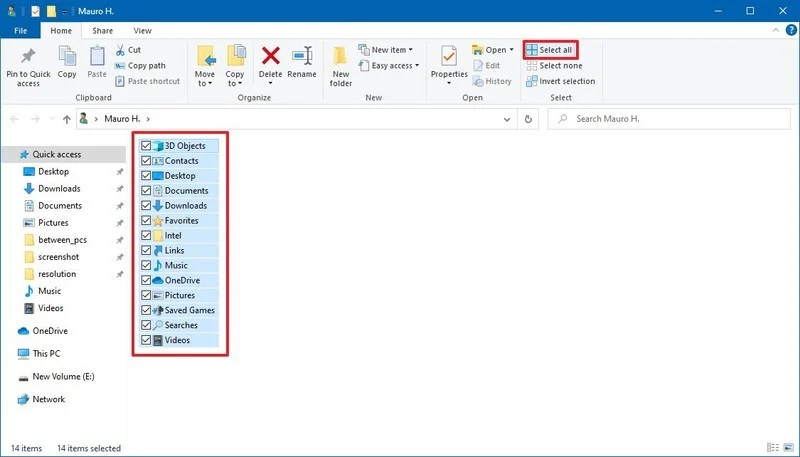
- From the Home tab, click the Select All button.
- From the Home tab, click the Copy To button.
- Select your destination path.
- Click the Copy button.
Step 2: Verify Windows 10 Activation
Once Windows 10 is activated, you no longer need to provide your product key for future installations on the same device. When the new installation is complete, the system will automatically reactivate when you connect to the Internet.
To check activation status:
- Open the settings.
- Click Update & Security.
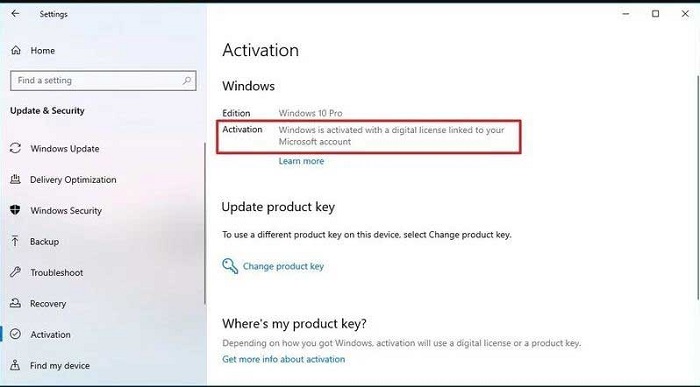
- Click Activate.
If the device is properly activated, you will see one of the following messages:
- Windows is activated with a digital license: The installation has been activated but is not linked to your Microsoft account.
- Windows is activated with a digital license linked to your Microsoft account: The installation will be activated, and your license will be linked to your Microsoft account.
After completing the steps, if the current setup is activated, Windows 10 will be automatically reactivated after a clean installation.
Read Also: How to Stop Auto Update in Windows 7 and Windows 10: A Complete Guide
Step 3: Create a Windows 10 USB Installer with Rufus
Download the Windows 10 ISO file from the Microsoft website. Then you can use the Rufus tool to create installation media for devices with motherboards with UEFI or BIOS firmware. To create a Windows 10 USB installer using Rufus, connect a USB flash drive with a capacity of 8 GB or more, and then perform the following steps.

- Open the Rufus download page.
- In the Downloads section, click the link to save the latest release to your device.
- Double-click the Rufus-x.xx.exe file to launch the tool.
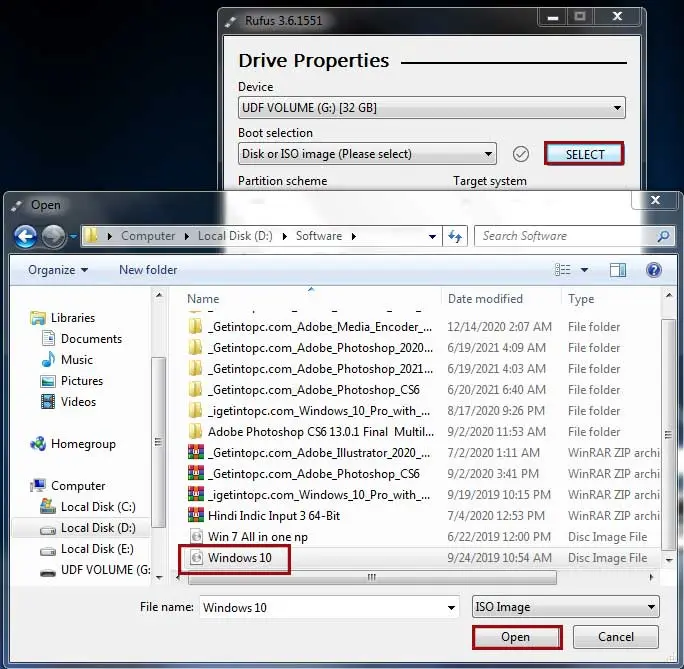
- In the Devices section, use the drop-down menu to select a USB flash drive.
- Click the Select button to select the Windows 10 ISO .
- Use the Image Options drop-down menu to select a standard Windows installation option.
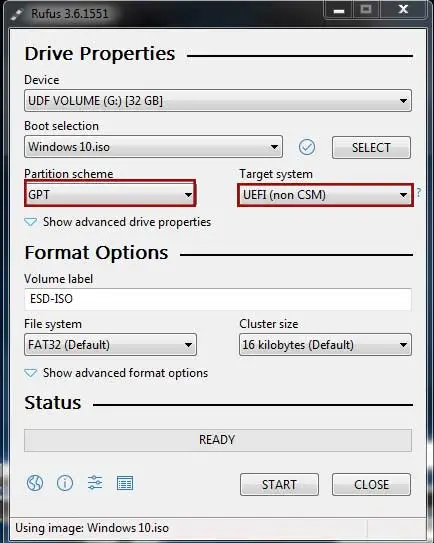
- If your computer includes a GPT BIOS scheme, select the GPT option for the partition scheme and then the UEFI (Non-CSM) option for Target System.
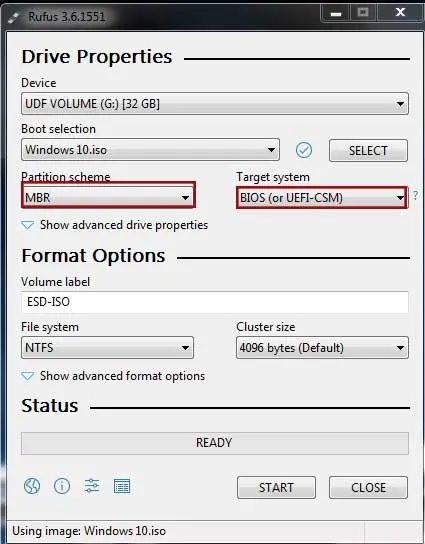
- If your computer contains a legacy BIOS, select the MBR option for the partition scheme and the BIOS (or UEFI-CSM) option for Target system.
- Do not change the default settings in the Show advanced drive properties section.
- In the Volume Label field, enter a descriptive name for your drive (for example, “windows10”).
- Do not change the default settings in the File System and Cluster Size sections.
- Click the Show advanced format options button.
- Select the Quick Format and Create Extended Label and Icon File options.
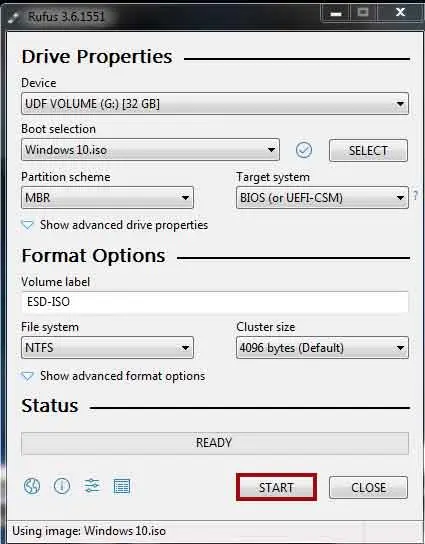
- Click the Start button.
- Click the [OK] button to confirm.
- After completing the 100%, click the Close button.
Step 4: Install Windows 10
Follow these steps to install Windows 10:
- Connect Windows 10 USB media on your system.
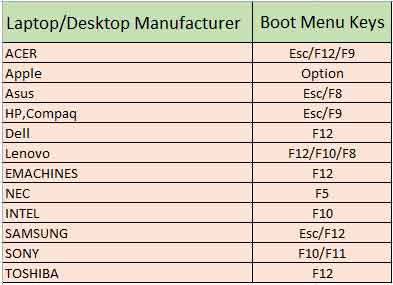
- By pressing the start key, press below given key until the “boot Device Option” appears.
- Select your Windows 10 USB device then press enter, and then on prompt, press any key to continue Windows setup.
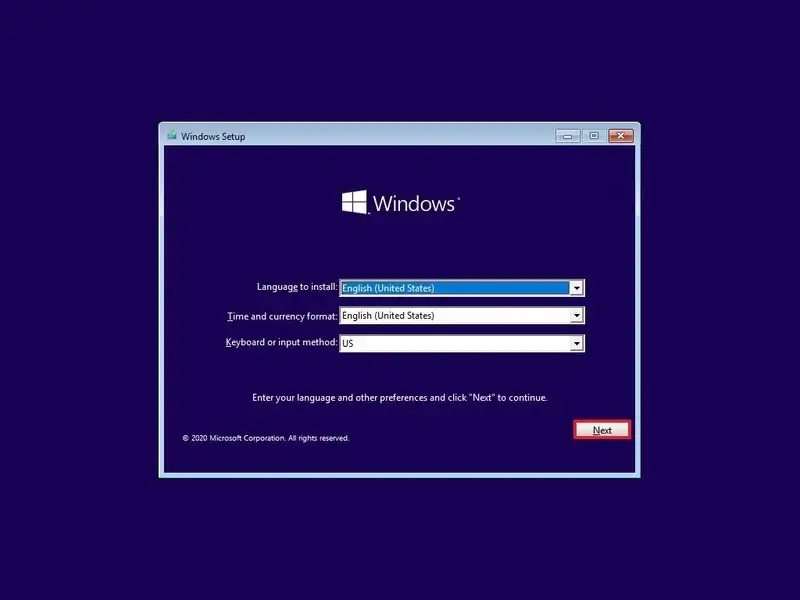
- In Windows Setup, if your language, time, currency, and keyboard differ from the default selections, be sure to select the correct settings before clicking the Next button.
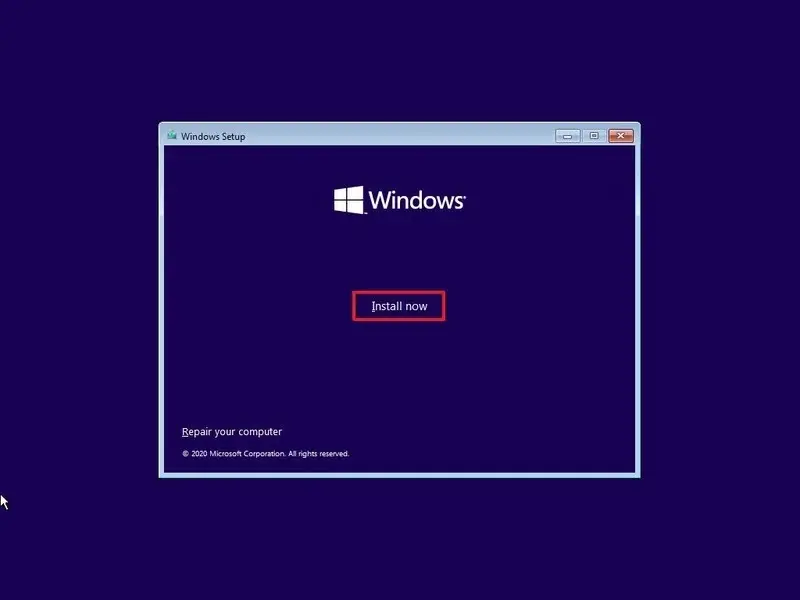
- Click the Install Now button.
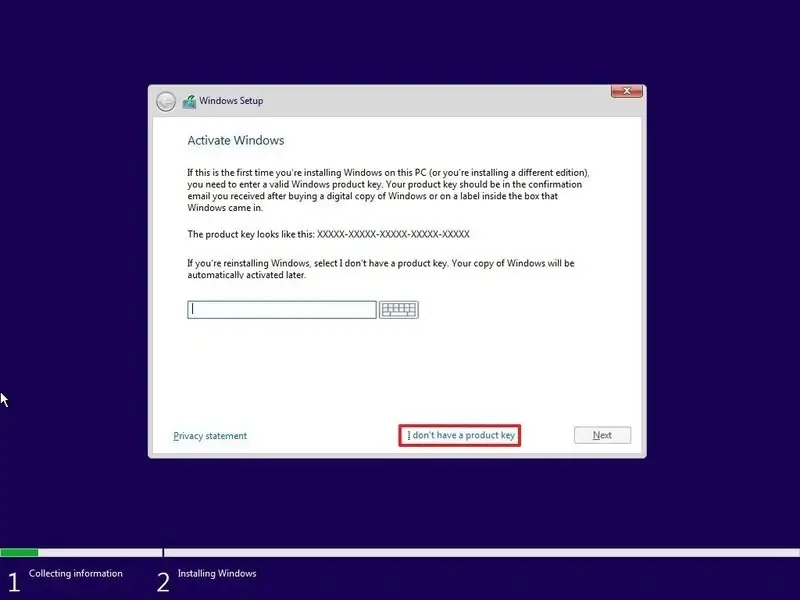
- If you’re reinstalling the OS, click I don’t have a product key option to continue. Otherwise, if you are installing Windows 10 for the first time, enter your product key.
- Click Next button.
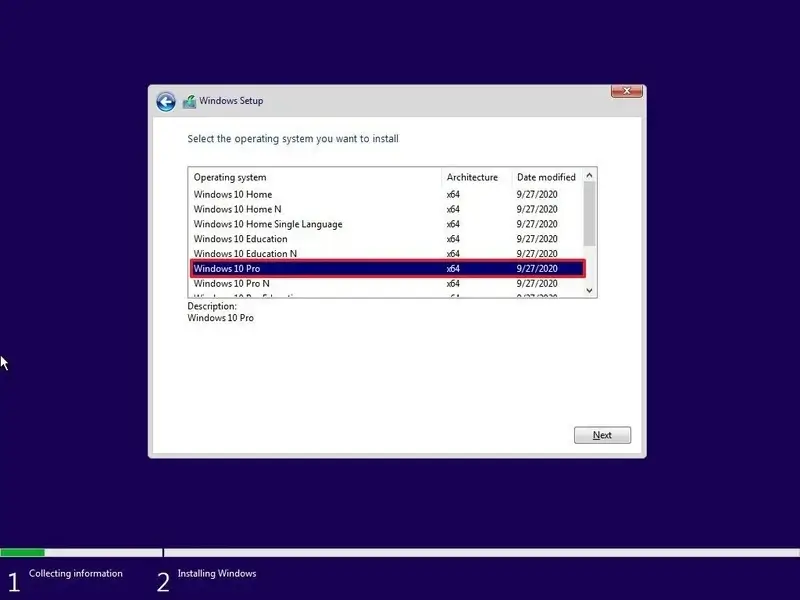
- Select the version of Windows 10 (This selection must match the version in which the product key is activated. If you don’t select the correct edition, Windows 10 will not be activated and you will have to start the entire process again.) then Click the Next button.
- Select the I accept the license terms option, then click the Next button.
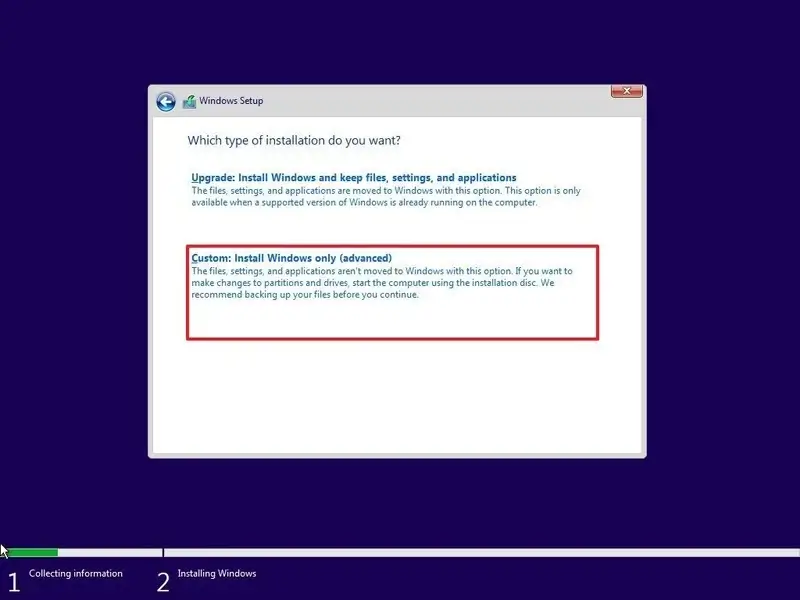
- Click the Custom: Install Windows only (Advanced) option to continue the clean installation.
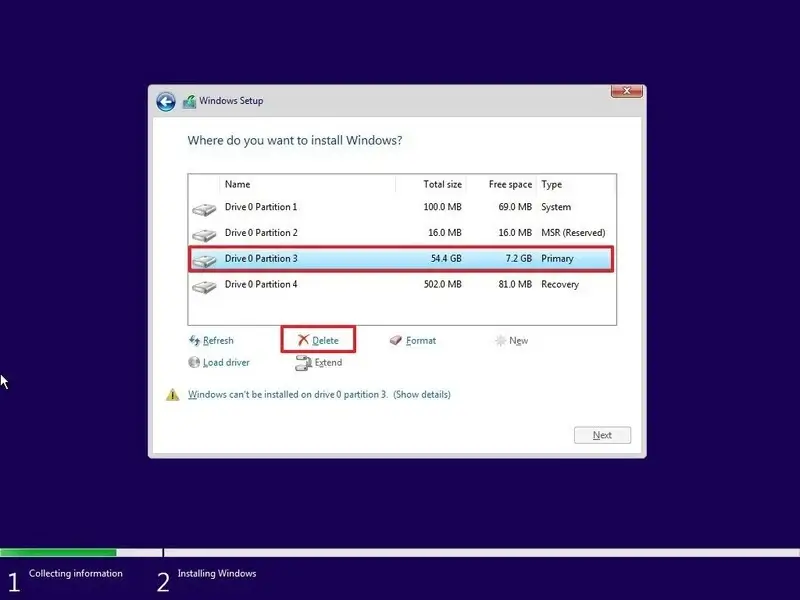
- Select the partition with the current installation (usually “Drive 0”).If Drive 0 has multiple partitions, then you can delete the system reserved partition (usually”Partition1”) and OS partition (usually “Partition 2”) or delete all the partitions.
- Select the empty drive as drive 0 Unallocated Space.
- Click the New button and fill the partition size in MB in the box that you want to create. Click OK, then it will create a system reserve partition also.
- For multiple partitions, again select “unallocated space” and then click on New, then fill partition size, then OK until you reach your desired partition.
- Select the partition as “partition 2,” except the system reserve, then click the Next button.
After completing the steps, Setup will install a new copy of Windows 10 on your computer. After the setup, you have to continue with the out-of-box experience to configure the preferences and account.
Read Also: Microsoft Password Reset: Step-by-Step Guide
Step 5: To complete the out-of-the-box experience in Windows 10, use the following steps:
- Select a regional option and click the Yes button.
- Select a keyboard layout option and click the Yes button.
- Select the Setup for Personal Use option and click the Next button.
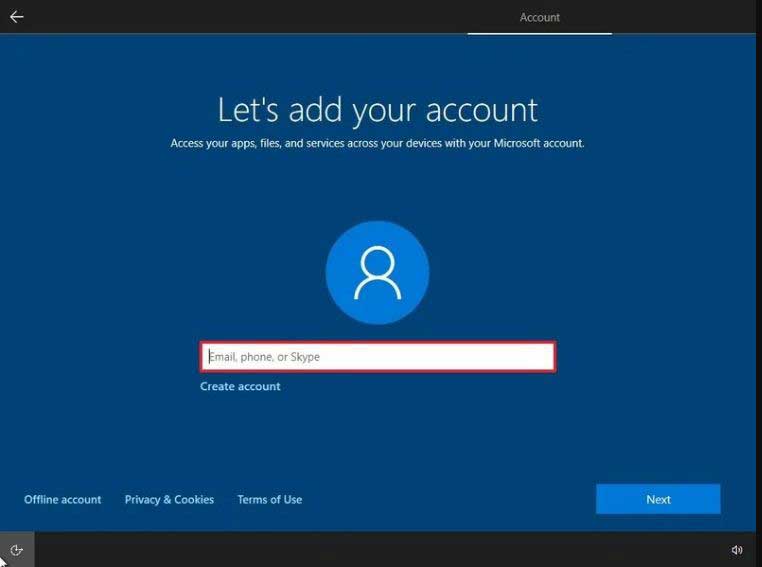
- Confirm your Microsoft account information to create an account, and then confirm your account password, then click the next button.
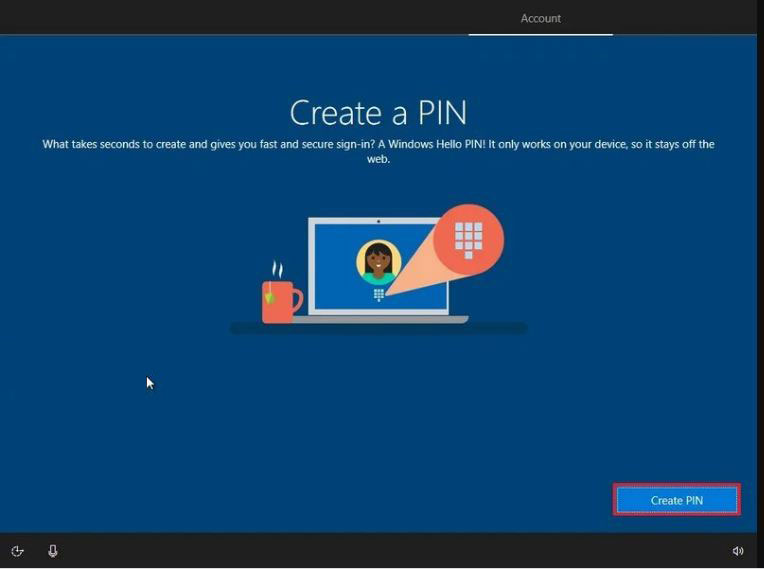
- Click the Create PIN button if you want to create or skip this option.
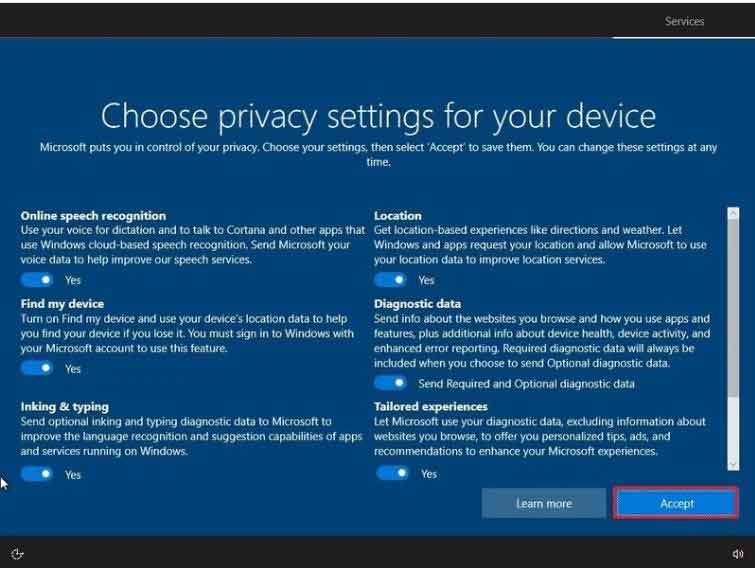
- Select your privacy settings and review all the available settings, then press the Accept button.
- (Optional) You can provide your phone number and then click the Send button to link your phone to your device. If you want to skip this option, click the Do it later button in the lower-left corner of the screen.
- (Optional) Click the Next button to allow OneDrive to back up the Desktop, Documents, and Pictures folders to the cloud. If you use another cloud service or prefer not to upload files to the cloud, click the Save files only to this PC option in the lower-left corner of the screen.
- Click the “No, thanks” button to skip the Microsoft 365 setup. If you have an Office product key, you can select the “I have a product key” option, and then the apps will install automatically on your device.
- (Optional) Check the Let Cortana respond to “Hey Cortana” option to use the assistance hands-free.
- Click the Accept button to allow Microsoft to collect personal information to make Cortana more personal. If you’re not interested in the digital assistant, click the Not Now button to continue.
After you complete the steps, the new settings will apply to the clean installation of Windows 10, and you should be able to see the default desktop experience.