Whether you’re using a Windows 11 PC or a Mac, capturing a screen is a valuable ability. Screenshots can help you maintain track of critical content, troubleshoot issues, and store and share data. This post will lead you through how to take screenshots on Windows and Mac, using both built-in tools like the Snipping Tool and third-party software. We’ve included simple instructions for both platforms, so you may capture the entire screen, a single window, or a portion of it.
What is a Screenshot in Windows 11?
A screenshot is a still image of a specific window or portion of your screen. It captures what is on your screen and allows you to share or save it for later. Screenshots are handy for sharing information, interesting content, or even funny photos with your friends or on the internet.
Read Also: How to Use SFC and DISM Scan to Repair Windows 11 and 10
How to Take a Screenshot in Windows 11
There are multiple ways to take a screenshot in Windows 11, including using keyboard shortcuts and tools. Here are some common methods:
1. Copy the Entire Screen to the Clipboard: Press Print Screen
Simply press the Print Screen (PrtSc) button on your keyboard to copy the entire screen to your clipboard. You can then paste it into an app like Paint or Word.
2. Save a Screenshot as a File: Press Windows + Print Screen
If you want to save a screenshot as a PNG image file, press Windows + Print Screen. The screenshot will be saved in the folder C:\Users\[Your User Name]\Pictures\Screenshots.
3. Copy the Active Window to the Clipboard: Press Alt + Print Screen
Use Alt + Print Screen to capture only the active window. This will copy the window to your clipboard. You can then paste it into an app like Paint or Word.
4. Capture a Portion of the Screen: Press Windows + Shift + S
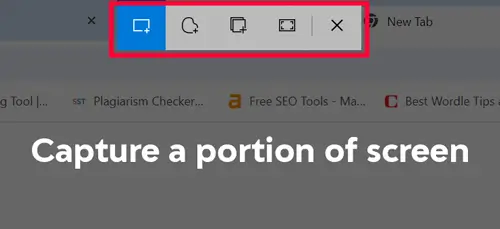
Press Windows + Shift + S to open a snipping toolbar that allows you to capture a rectangular, freeform, window, or full-screen snip. in this method, screenshots are saved in the Snipboard, from where you can edit and save. This screen capture method is perfect for grabbing specific parts of the screen.
Read Also: How to reset admin password windows 8.1, 10, and 11 safely [with picture]
Snipping Tool for More Control
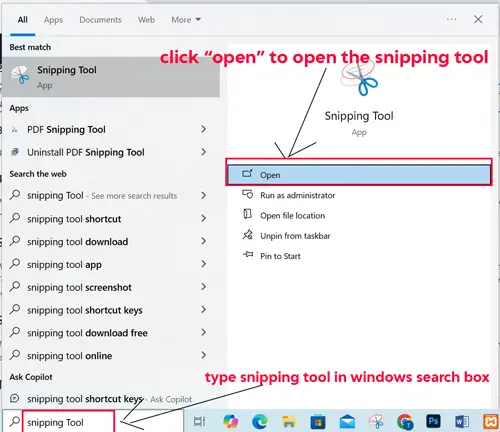
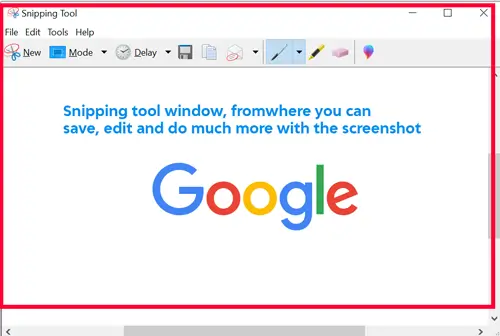
Windows 11 also includes the Snipping Tool, which gives you more control over your screenshots. Type “Snipping” into the Start menu search field to launch the Snipping Tool. After opening the Snipping tool, click New>> drag the area, and release the mouse. The screenshot will show in a snipping tool window. You can then annotate, save, or share your screenshot.
Screenshots Without a Print Screen Key
If your keyboard doesn’t have a Print Screen key, you can still take screenshots. Open the Snipping Tool or use Windows + Shift + S for screen capture. For devices like laptops, you may need to press the Function (Fn) key along with Print Screen.
Third-Party Screenshot Tools
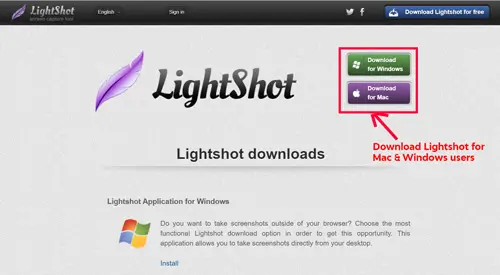
In addition to built-in tools, many third-party utilities allow for enhanced screen capture, including options for editing and sharing. Popular choices for Windows include tools like Lightshot and Greenshot.
Read Also: What is a Shortcut Virus and how to remove it?
If you’re using a Mac, taking a screenshot is equally simple. Here are some Mac-specific options:
How to Take a Screenshot on Mac
- Entire Screen: Press Command + Shift + 3 to capture the entire screen.
- Portion of the Screen: Press Command + Shift + 4 to select a specific area.
- Window Capture: Press Command + Shift + 4, then press Spacebar to capture a specific window.
These methods apply whether you’re looking for a screen snip on a Mac or Windows device.
Conclusion
Taking a snapshot on Windows and Mac is easy if you know the key combinations. On Windows, you can use the Print Screen (PrtScn) key to capture the entire screen, or specific key combinations such as Windows + Shift + S for additional control. On the Mac, Command + Shift + 3 captures the entire screen, whereas Command + Shift + 4 allows you to select. Both operating systems also include options for capturing, modifying, and sharing screenshots, making it easy to capture and share important details quickly.